The Write Way to Novel: Step 30ish, Book Trailer

So I wanted to time travel to step 30ish, book trailer, so I could unveil my newest book trailer.

I started making home movies in elementary school with a video camera and advanced to a sound/video mixer board by high school, so I could parody things like The Blair Witch Project. (Man, I wish I still had that! I accidentally taped Buffy episodes over it.)

Now I’m going to pause for my younger audiences and explain a few of the above terms:

  • Buffy the Vampire Slayer = The best show ever made. This is not an opinion. It’s been proven by… science and Thrillist.
  • “Taped over” is something cringe-worthy that used to happen with VHS tapes.
  • Video Home System (VHS) tapes are like DVDs but square with literal film-tape inside that the movie was printed on. (I can’t tell you how many times the film got tangled in the player, and I had to take apart both the player and the tape to disentangle one of my favorite movies, so I wouldn’t have to re-buy it.)
  • Digital versatile discs (DVDs) are round discs that hold movie files that stop working the second they get scratched or warped, but sparkle nicely if you put them in the microwave. (Caution: Don’t do this with any microwave you intend to keep. It’s not healthy.)

In college, I used Windows Movie Maker, to edit together shot-by-shot remakes of movies like Rushmore and after college, I learned how to make videos with iMovie, Final Cut Express and Abode Premiere for various jobs.

Adobe Premiere is my program of choice, but the free iMovie app (which works on Apple devices) is pretty amazing and a good option if you can’t get a copy of Abode Premiere.

So why am I telling you all this? The point of the story is, you should watch Buffy. (It’s on Hulu now.) But also that you should learn to make videos, and here’s how from someone with experience. But you can shortcut that experience. How did I learn Premiere? YouTube. You can learn anything on YouTube with patience and clever searching. One day I opened Abode Premiere and just started. Every time a pop-up box asked me a question, I Googled what I should do as a clear question and YouTube always had the answer in a 2-minute demo video. This takes time, but you’d be amazed how fast you can crank out your first 2-minute video. But I do have some overarching suggestions I’ve learned from experience:

  • Film horizontally. Filming vertically looks cool on social media, but filming horizontally is more professional, since televisions have a 16 x 9 ratio. But if you want to put this on a platform that has vertical videos, you can export a vertical version of your horizontal movie after you make it, so you can post it in more places.
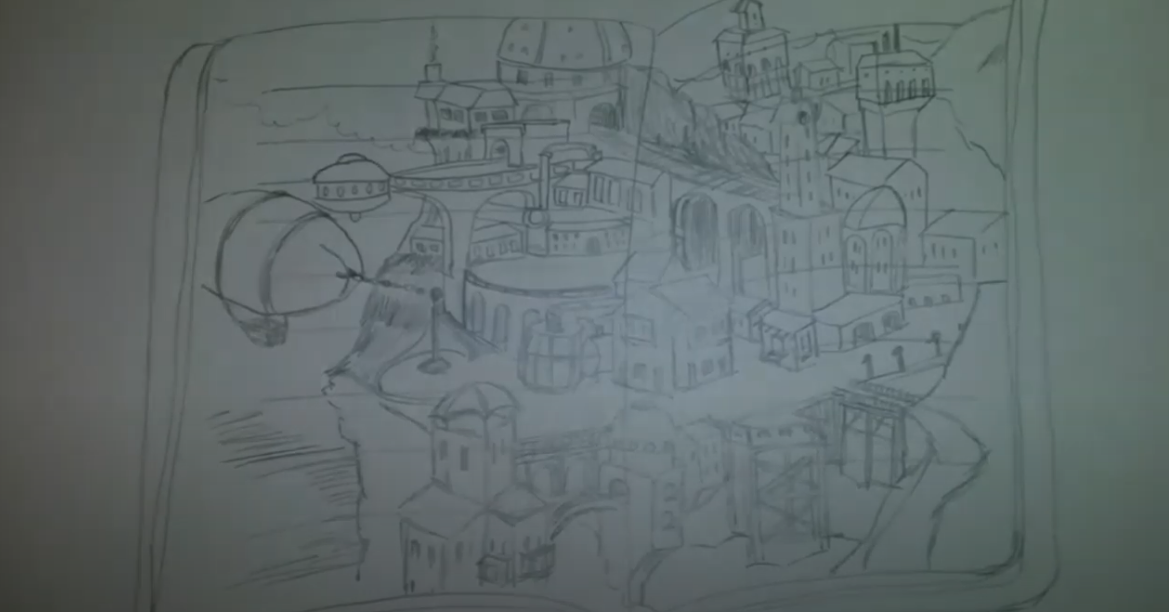
  • Frame your subject and background well. Put your subjects to the right or the left (golden ratio) and shoot them from the chest up, leaving a “coke can” amount of space between the top of the frame and their head. Have something interesting in the background, like my Hogwarts painting, on a slant with no other clutter in the shot.
  • Don’t skip camera stabilization or good lighting. You can get away with using natural light well or propping your iPhone on a pile of books on a table, but you must have a well-lit space and no camera shake. If The Hunger Games taught us anything, it’s that viewers hate camera shake. (Okay. There are probably a few more lessons in there.)
  • Record audio separately. Viewers have no patience for bad sound. I turned my old iPhone 6 into a recording device using the Voice Memos app and this amazing microphone. You can easily “Merge Clips” in Premiere to replace a video’s sound file with your better one. (Just Google, “How to merge clips in Premiere.”) This is an awesome feature that didn’t used to exist. You used to have to eyeball/manually line up audio, which could make any grown person cry.
  • Cross dissolve is usually the right answer for transitions. Though there are, of course, exceptions.
  • “Set to frame size” is your friend! I didn’t know this existed for a while, which was frustrating. Just right-click on your clip to make it whatever size it needs to be to correctly fill the screen. 1920 × 1080 pixels is a good HD size to stick to.
  • The Ken Burns effect is your best friend! This is where you zoom in/out on a still photo to make your shot not boring. It’s a pain to do in Premiere, though YouTube will tell you how to throw away that hour of your life. iMovie actually has a Ken Burns button! I wish Premiere had this. I’ve asked Adobe to add it often.
  • Envato is a good place to buy cheap stock music. No, you can’t put any song you like in your video. You can get sued for copyright, and YouTube usually won’t even let you post it.

And that’s it. If you’ve made any book trailers, link to them in your comments below.

The Write Way to Novel: Steps 4, 5 and 6, Passion, Purpose, Titles, Settings and World-building

Passion and purpose aren’t optional. You must have purpose behind your novel and you need to be passionate about that purpose, or you shouldn’t even try. I wrote a time travel novel for 29 years, because it’s really an allegory for being disabled, and the point is that disabled folks aren’t “less than.” There’re just different. I was so passionate about this point, it carried me through years of writing and rewriting. You won’t get through 50,000+ words if you’re not fueled by passion and purpose. For more detail on how to find the purpose of your story, read this.

Titles need to ring. Good titles often come to me from the voice in my head. But sometimes, the voice only has obvious titles followed by a shrug. When this happens, Thesaurus.com and mind mapping are helpful. Circle a concept in the middle of a page and branch off related words. Eventually, you’ll find something.

Settings and built worlds need to feel real. If your setting is like the real world, you need to use it to reflect the emotions, characters and themes in your story. For more about what settings should accomplish, read this.

If you’re building a whole new world, you need to determine a bunch of things to make it feel real. Here’re 20 questions to get you there.

It’s also a good idea to have your characters experience smells, sounds and temperatures wherever they go in addition to quickly describing what they see. When possible, have them knock into things to feel them, too. (Have them interact with the setting instead of just staring at it and describing it, because that’s boring.) Taste is not something you’ll always be able to get in, but do it when you can. Sometimes, you can taste smells in the air.

Get started. Next week we’ll tackle writing scene by scene.

The Write Way to Novel: Step 3, Design Characters

Pick names for your protagonist, antagonist, love interest and best friend and any important family members. I always pick names that have meaning for the story in an unobvious way. Baby name websites are good for this — like if you want to have a reporter character, whose name means truth, you’d name her Alice—the name of the reporter character in my Periphery series.

Caution: Unique names are tricky. If they don’t sound like real names, readers will get distracted while reading. So unless there’s a story reason for a strange name, or you’re writing in a genre where weird names are the most normal thing about it, stick to names you’d hear in everyday life.

A note about character questionnaires: Do them if they help you; skip them if you don’t. They don’t help me. Unless there’s a story reason for it, it doesn’t matter what your character’s favorite color is.

What matters are the answers to the big three questions:

  1. What does your character want? They have to one big, clear goal to move the story forward, even if it changes every act. (And it can.)
  2. What does your character need? What do they need to grow, whether they know it or not? (And they probably don’t.)
  3. What is their flaw or misbelief? If it’s a flaw, they need to overcome it to get what they need. If it’s a lie they believe, they need to learn the truth to get what they need. This idea of misbelief is from Lisa Cron. Both her books Wired for Story and Story Genius are worth reading and keeping by your computer.

Bonus: What’s unique about your character’s personality and appearance? Are they unusually blunt? Do they have a scar above one eye? This helps your readers remember who’s who. It’s not a must but a good idea when possible. 

Pick character types. A great book to help you pick character types and see how they’d interact is The Complete Writer’s Guide to Heroes and Heroines, but these are the types I use the most:

Character Types

Male

Chief
Strengths: Goal-oriented, decisive and responsible
Weaknesses: Stubborn, unsympathetic, dominating
Style: Born leader

Lost Soul
Strengths: Devoted, vulnerable and a great judge of character
Weaknesses: Depressed, unforgiving, expects the worst
Style: Wanderer

Bad Boy
Strengths:
Charismatic, street smart and intuitive
Weaknesses: Pessimistic, bitter and volatile
Style: From the wrong side of the tracks

Female

Boss
Strengths: Confident, dynamic, Competitive
Weaknesses: Blunt, workaholic, arrogant
Style: Trailblazer

Crusader
Strengths: Courageous, determined, persuasive
Weaknesses: Obstinate, rash, opinionated
Style: On a mission

Librarian
Strengths: Efficient, serious, dependable
Weaknesses: Rigid, repressed, perfectionist
Style: Know-it-all

Enneagram types can also be helpful for character-building.

So make some characters that make sense, whether you base them on character types or people you know. (Because if you can let reality do the work for you, why not?)

Then plan an arc. K.M. Weiland has great advice for how to make all types of character arcs.

Okay get started. Next week we’ll talk about title, purpose, setting and world-building.

The Write Way to Novel: Steps 1 and 2, Logline and Outline Tests

Logline-test your story ideas until one fits the below format (from Save the Cat! Write a Novel) and sounds like a book you couldn’t put down. (Save the Cat! Writes a Novel is best the structure book I’ve ever read. You should buy it if you’re able. It has much more valuable information in it than this.)

On the verge of stasis = death moment, a flawed hero breaks into act two, but when the midpoint happens, they must learn the theme stated before all is lost.

An example from the novel I just finished is: On the verge of uncontrollably and randomly time traveling forever, an alcoholic, amnesiac time traveler crosses the universe in search of his true home. But once he finds it, he’ll have to give up the memory and home he’s searched for to stop the whole universe from burning.

Alright. Do it! Paste what you come up with into the comments if you want.

Outline-test your story idea. I like the 6-act structure, but you can use whatever structure you want. Here’s a template I use for outlines, if helpful. And 6ActStructure.com is the best structure website I’ve found and you should follow it and subscribe to their awesome YouTube Channel.

If you can fill in this template and the story sounds exciting, you’re ready to start character building, which I’ll post about next week.  

The Write Way to Novel: Step 0, How NOT to Novel

I started writing a time travel novel when I was 10, in 1990. And I just finished it for NANO 2020, 29 years later. I’ve written and self-published other novels since then (each in less than a year), but this was my white whale. Why? Because I did everything you’re not supposed to do while writing a novel. I didn’t finish the novel until I stopped doing those things. So here’s how NOT to write a novel:

Novel don’ts:

  • Don’t decide what your story is about after you write it. I had no idea what I was trying to say until I spent 29 years trying to say it. Trying to write through the pain to get to your hidden truth is a waste of your life. Nail down why you’re writing it and what you’re trying to say before you write a word.
  • Don’t ignore structure. I was a pantser. I wrote what felt right with no direction. It created hundreds of pages of beautiful prose that I couldn’t use and still can’t. I wasted years denying that structure is story. You need a plot. It doesn’t matter what framework you apply to your story, but you must have one. You can use the 3-or 6-act structure, the snowflake method, the Save The Cat! Beat Sheet or countless others.
  • Don’t cut anything until you’ve finished a draft. Almost everything I cut has ended up back in my story in some form. If you cut too early, you’re not giving yourself a chance to make it work. Usually, with rare exceptions, there was a reason you put it there in the first place. Write all the way to the end of the story before you cut anything.
  • Don’t edit as you write. I spent 29 years writing, rewriting, editing, tweaking and perfecting whole sections that didn’t even end up in the book. Finish your first draft first, then edit. Writing and editing are different parts of the brain. Switching between them constantly is exhausting and results in clunky, uneven writing. Plus, it’s a waste of time to polish a whole chapter that gets cut.

Novel do’s:

  • Test the logline before you start writing. I use the formula from Save the Cat! Writes a Novel: On the verge of stasis = death moment, a flawed hero breaks into act two, but when the midpoint happens, they must learn the theme stated before all is lost. An example from the novel I just finished is: “On the verge of uncontrollably and randomly time traveling forever, an alcoholic, amnesiac time traveler crosses the universe in search of his true home. But once he finds it, he’ll have to give up the memory and home he’s searched for to stop the whole universe from burning.” If you can craft a compelling sentence using this formula, you can craft a compelling story. You’d be surprised how many stay-up-all-night ideas don’t pass the logline test.
  • Test the outline before you start writing. I use the 6-act structure to determine if there’s enough story to fuel a whole novel. Writing this type of outline only takes me a couple of hours. That’s so much better than sinking hundreds of hours into writing a novel that will never work.
  • Keep a “cut parts” file. I have a document that’s 10 times longer than my novel that has every scene I’ve ever cut, because I wasn’t sure where to put it. This is the best writing habit I’ve ever formed. If I realize an amazing scene I perfected two years ago would fit well in a certain spot, I don’t have to rewrite it, I can just look it up with a control “F” keyword and put it in. Sure, I always end up rewriting the scene, but rewriting from something is faster than writing from nothing.

But that’s just the big picture. I’ve been searching for an exact step-by-step/scene-by-scene instruction on how to write a novel, so my next one is easier. I haven’t found one I’m satisfied with, so I’m writing one. Each week, I will post a different step on how to write a novel, while I write a new novel the right way, and I’ll provide a scene-by-scene template for the whole thing. Then I’ll even provide advice on how to self-publish, market and traditionally publish your novel, as I do it myself. So subscribe below, so you know when I post.

Follow “The Write Way to Novel”

Get new posts delivered directly to your inbox.